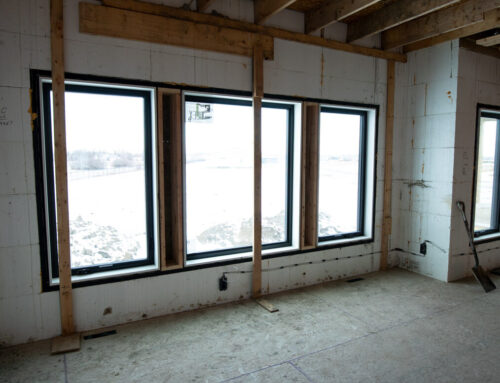
Bracing & Alignment
Welcome to the BuildBlock ICF Installer Training Series: Bracing and Alignment. This 20 part video series is intended to be an educational walkthrough of the ICF building process. From the early planning phases to pouring concrete and finishing walls, this series will provide the basic knowledge you need to have a successful BuildBlock ICF build.
In the 10th video of this series we identify the 4 basic components of an ICF Bracing and Alignment system as well as explain its 3 primary functions.
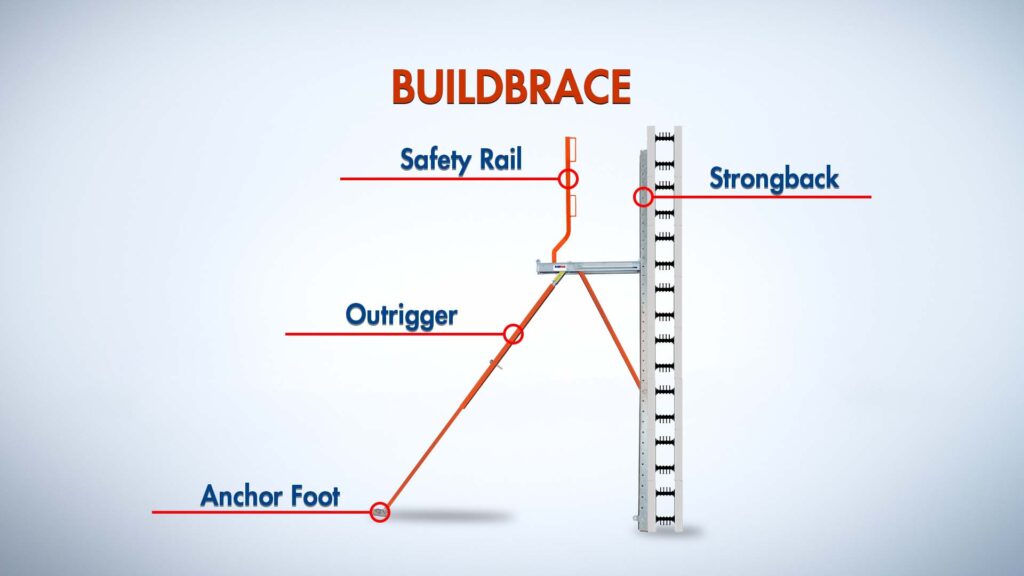
The 4 components of BuildBrace
The videos in this series are produced as a companion to the BuildBlock Installation and Technical Manuals available for free download on the Publications Page or for purchase via the BuildBlock Online Store. You can view more videos in this series via the BuildBlock Blog or by subscribing to the BuildBlock YouTube Page. For a more in-depth training experience, you can take the free Online ICF Installer Training Series.
Video Transcript
ICF Bracing and Alignment
Welcome to the bracing and alignment portion of this training series. In this video we will identify the four basic components of an ICF bracing system as well as understand the three functions of an ICF bracing and alignment system.
Before beginning any ICF project, understand and plan for your bracing needs.
Braces are placed every 4-6 feet to align ICF walls, withstand wind during construction, and prevent leaning walls. Additional bracing may be needed around corners, openings, bulkheads, and vertical seams so plan accordingly to ensure that there is enough bracing onsite.
Once walls are braced, most bracing systems also create an appropriate scaffolding or platform to provide a safe and stable work area for workers and equipment as the walls go higher. Once the platform reaches sufficient height, install vertical safety bars as required. Erect the bracing system after the third or fourth course is stacked. This ensures that the system is in place before it becomes difficult to place horizontal rebar or stack additional courses. Take stock of weather conditions. If it is exceptionally windy it may be necessary to brace walls earlier in the stacking process.
Our example uses BuildBrace, but most all bracing has four components:
- The Strongback, which is the vertical upright section that attaches to the ICF wall.
- The Anchor Foot, which is placed securely on the ground and is staked onto dirt or sand, or temporarily attached to concrete.
When securing bracing to the concrete slab use tapcon screws. If you’re unable to use concrete screws because of in-floor heat, a 2×6 plank can be glued to the slab using low expansion spray foam adhesive. The bracing will then be attached to the wood. When finished, remove bracing and wood and scrape the slab clean to remove all traces.)
- The Outrigger, which connects the anchor foot and strongback diagonally. This component also contains an adjustment mechanism to change the length of the outrigger, moving the brace in or out to assist with wall alignment.
- Lastly, the safety rail. These are usually wood or metal and are attached or inserted into the bracing system. An optional BuildBrace Steel Safety Rail is designed to integrate into the bracing system and provide easy and quick installation. A safety rail is required by Osha and protects workers from falling off the bracing walk boards.
The final working height should be sufficient to place vertical rebar, inspect the wall cavity, safely pour the ICF wall, and internally vibrate during the pour.
When attaching bracing to the ICF wall, first attach the strongback using coarse thread RemoveRite Duplex Screws. These screws will not strip and are reusable from job to job. The screw is placed in the top of the slot in the strongback and left slightly loose. The forms will compress and settle slightly as concrete is placed and at the top of the slot the screw can travel downward slightly. If placed at the bottom of the slot, the screw cannot move downward and the pressure is transferred to the brace making the wall difficult to align and possibly bowing the wall or damaging the bracing.
BuildBrace is designed to align with BuildBlock hard points. Attaching to the high density attachment point isn’t required, but recommended whenever possible. This will eliminate any screws from being stripped out where you need them to align and support your walls.
Caution: Be careful not to overtighten screws or place them in the bottom of the slot. This will cause the alignment system will work against a straight and plumb wall.
As with every step of the building process, be sure to comply with all safety regulations and best practices when bracing ICF walls. Safety rail regulations may vary so check local codes.
In conclusion, bracing and alignment is paramount as you prepare for a safe project and pour. Successfully creating straight, plumb walls will make for a structure that is solid and sound. This ensures other trades and the rest of the construction that follows will be smooth and simple.
